
Rookie Year: The Engineering Intern’s Toolbox (Part 4)
A Series of Technical Blogs for Engineering Interns & Entry-Level Engineers
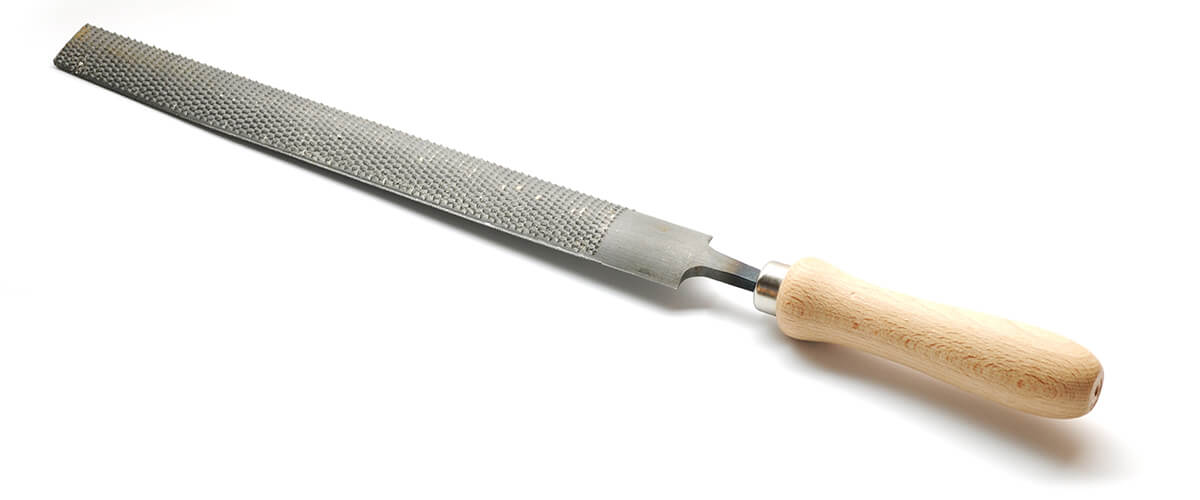
Everyone knows how to use a hand file, right? Simply grab one and saw away. After all, it’s nothing more than sandpaper on steroids. Well, I hate to break it to you but knowing how to use this basic tool is a clear sign of being a veteran. Rookies will file away for hours while a master will get the same job done in half the time. Let’s go over the basics.
+ What is a Hand File?
A hand file is essentially a hand saw with a very wide blade. Just like a saw, it cuts material using teeth. A typical hand file is made from a bar of high-carbon steel with its teeth pressed, cut, or raised into the steel. After the teeth are made the bar is heat-treated making it harder than most other materials it is likely to come across. As a result, when those teeth are rubbed across another piece of softer material, the teeth will dig into the material and pull bits away.
+ Using a File
Most people who haven’t been trained will file in a back and forth motion. This is both inefficient and potentially damaging to the file. The correct technique is to push the file forward to make a cut then lift the file off of the work piece when the file is drawn back. In effect, the only time the file comes in contact with the work piece is on a forward stroke, see Figure 1.
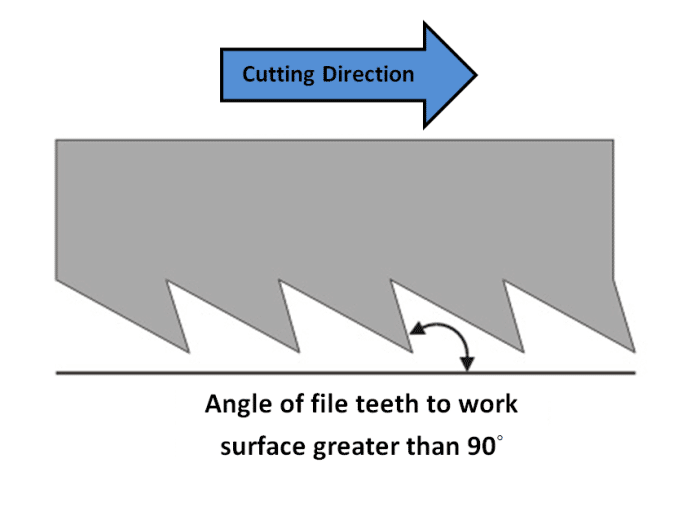
Filing back and forth is wrong for two reasons. First, a file is like a saw blade and only cuts in one direction. Both file and saw teeth have an angle relative to the work surface known as a rake. In one direction the angle is sharp enough to dig into softer material in order to remove it. In the opposite direction the rake is much shallower so the teeth push away from the work surface vs. digging in. Using the file in such a way can damage the file because it will round over the top of the teeth dulling the file without doing any work.
The second reason filing back and forth is not wise is that it will clog the file and become less efficient. When a file is pushed forward the cut material collects between the teeth of the file. After one pass most of the spaces are filled with small pieces of material. Without removing that material the next pass will be less effective. By lifting the file after a cut it allows for the cut material to fall out from between the teeth and make room for the next pass.
+ File Teeth
The size and spacing of a file’s tooth correspond to the file’s coarseness. Fine files have small, frequently spaced teeth which don’t remove a great deal of material per stroke. Alternately, coarse files have larger teeth with fewer teeth per inch. These larger teeth remove more material per stroke and therefore cut material quickly. Typically there are three levels of coarseness: bastard (coarsest), second-cut (medium), and smooth (finest).
Along with the size of the tooth is the pattern of the teeth. The pattern directly affects the character and is referred to as the cut of the file. The character gives special properties to the file such as making a file cut faster or slower independently of its coarseness. There are four standard types, see Figure 2.
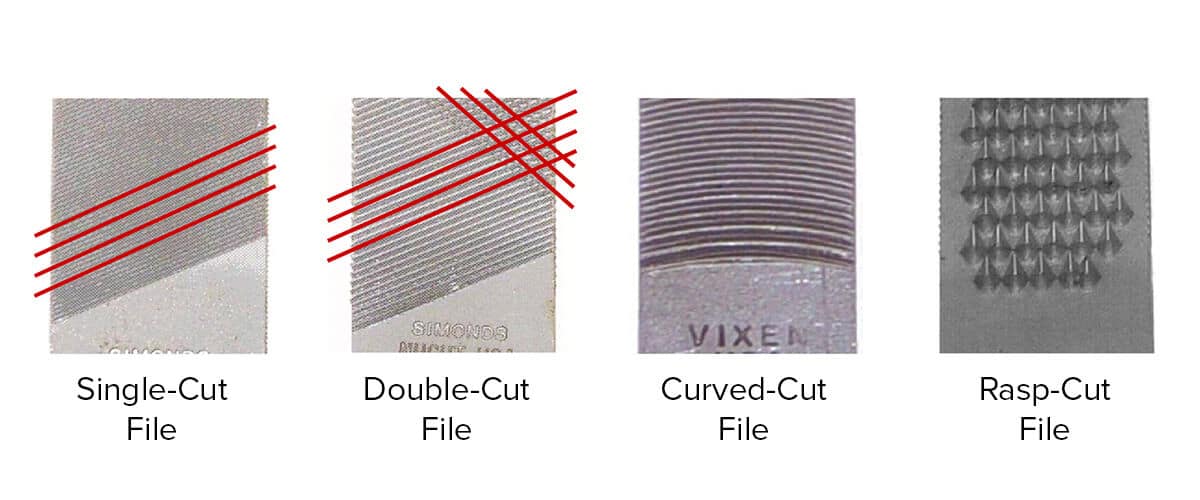
Single-cut files have a single row of diagonal teeth. These teeth run parallel to each other and extend the length of the file’s face. These files are good for both soft and hard materials.
Double-cut files have two sets of diagonally-cut teeth. The interlaced teeth create a diamond-like pattern which allows the file to cut twice as fast as a single-cut file. They are good for quickly cutting hard materials. The teeth will clog if used with soft materials.
Curved-cut files have teeth cut in a curved contour across the working surface of the file. They are used for smoothing and blending.
Rasp-cut files have a pattern where each tooth is individually formed. They are separate, disconnected, and typically stand much taller than other cuts. They are used for very large removal of soft materials such as wood or plastic. The teeth will dull when used against hard materials.
+ Combining Cut and Coarseness
The effectiveness of a file is based on picking the best combination of cut and coarseness for your specific application. The easiest way to pick a combination is to determine how fast you want to remove material and what you want the surface finish to be. Below are some useful combinations. Note: The hardness of your material will affect the surface finish and speed of cut.

Figure 3
Fast/Rough (Soft Material): Use a rasp when you want to hog out and obliterate material.
Fast/Rough (Hard Material): When you want to remove hard steels quickly use a coarse single-cut or a double-cutting coarse (bastard) file.
Medium Speed/Good Surface (Soft material): Use a coarse (bastard) file. It will remove slower than a rasp and give a finer surface.
Medium Speed/Good Surface (Hard Material): Use a single-cut medium or double-cut fine.
Slow/Good Surface (Soft Material): Use a medium file.
Slow/Good Surface (Hard Material): Use a fine file with a single cut.
+ Filing Techniques
Below are some common techniques for how to use a file. As a general rule of thumb, using two hands are preferred. This gives the user the most amount of control.
Heavy Filing (Speed of material removal)
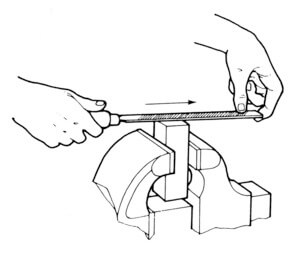
This technique as seen in Figure 4 is used when a lot of material needs to be removed quickly. Hold the file by its handle with your dominant hand. With your opposing hand place your palm onto the tip of the file. Your palm is used to help press down while your dominant hand is used to guide and control the direction of the file. Rather than press hard for aggressive cuts switch to a more aggressive (coarse) file. Pressing too hard will dull the file more quickly.

Light Filing (Light removal or increasing surface finish)
This technique is used when material must be removed slowly, see Figure 5. It uses the same general technique as before but rather than applying pressure with your palm you apply pressure with your thumb only. With practice your thumb can vary the pressure to precisely control the amount of material that is removed.
Draw Filing (Surface finish refinement)
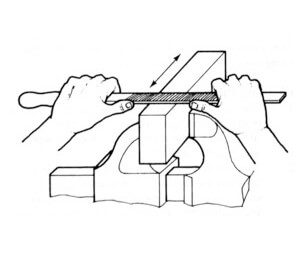
Draw filing is a modified technique that should only be used with single and double-cut files. In this technique, the file is turned sideways and is grasped on both ends, see Figure 6. The file is then sawed back and forth to remove material. The reason sawing back and forth is acceptable in this case has to do with the diagonal teeth of the single and double-cut files. As the file is drawn back and forth newly cut material forces the material off the teeth. With the double-cut variety of file both strokes of the file are cutting into the material reducing the chance of dulling.
+ File Cleaning and Maintenance
Cleaning a file is a sign you know what you’re doing. Like any tool a file needs to be cleaned before, after, and sometimes during use because pieces of cut material fill in between the teeth of the file. Sometimes simply lifting the file up is not enough to release the chips of material. To clean a file use compressed air, rags, or a file card brush (see Figure 7) to prevent material build up. Keep in mind that the finer the file the more often it will need to be cleaned.

One way to prolong the life of a file is to use a lubricant while cutting material. The best lubricant for a hand file is good old-fashioned blackboard chalk. After you’ve used a file card brush to clean the file, rub a light coating of chalk on the cutting surface of the file. This will help the file run smoother and prevent bits of metal from building up in the teeth of the file.
Written By: Sean Derrick – Product Development Engineer |
Sean has a B.S. in Engineering Design and a M.S. in Manufacturing Engineering from Western Michigan University. He has over 7 years of product development experience in a variety of industries ranging from medical, automotive, furniture, consumer products, and defense. Sean enjoys hiking, mountaineering, skiing, movies, and is pursuing a Ph.D in his free time.
Written By:

Sean Derrick
Product Development Engineer
DISHER Newsletter
Sign up to receive articles and insights, delivered monthly.
Schedule a no-committment project call
Reach out to discuss your project to find out if DISHER could be a good fit for you.
