Metroto-WHAT? Metrotomography and Why it Matters
September 30, 2015

Written By:
Sam Passenger | Manufacturing Engineer

Recently, I was presented with a set of problems. A customer was struggling to measure a complex three-dimensional surface on a small plastic part. The feature in question is critical to the function of the component. Often, conventional laser scanning is the solution to analyze such features; however, the particular material used for this component is too translucent to be accurately laser scanned.
Furthering the complexity, this and several other small components are assembled and the assembly was not performing as expected. But since we were not measuring the individual components, there was no way that we could do an objective tolerance analysis to diagnose the problem and begin to engineer a solution.
Fortunately, I had the perfect answer: Metrotomography!
But what on earth is Metrotomography, you ask? Metrotomography is the combination of metrology (the science of measurement) and tomography (imaging with penetrating waves). Functionally, it is the industrial application of CT (computerized tomography) scanning to measure parts through the use of an x-ray scanner and detector.
Very similar to medical CT scans performed in hospitals, metrotomography allows for real world items to be three-dimensionally recreated in a virtual environment for detailed analysis.
Applications
Industrial applications for CT scanning are broad. Many different functional areas across numerous industries can benefit from the capabilities of metrotomography. The only real limitations are physical size capacity of the scanning machine and material density of the object to be scanned.
The machine’s x-rays are not able to penetrate as deep on dense materials, thus the thickness of the part that is able to be scanned decreases as material density increases. Low density materials, such as plastics, are ideal; however, it is possible to accurately scan metals, especially lighter alloys such as aluminum and magnesium. One additional problem is that if two materials of vastly different densities are in close proximity, some degree of interference is generated and accuracy in that area is reduced (i.e. plastic touching metal).
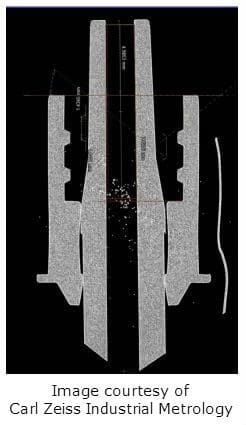
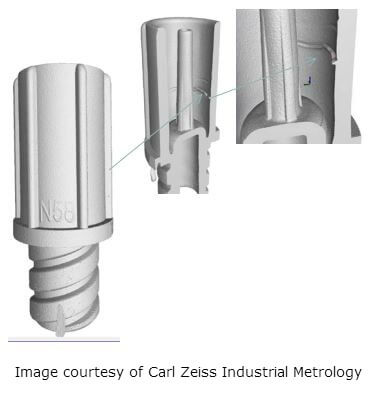
Perhaps the greatest benefit of metrotomography is the ability to see directly through parts. The penetrating nature of x-rays allow for 3D models to be created from parts that show both external and internal geometry simultaneously.
Scans can also be performed on parts after they have been combined into complex assemblies. This is especially valuable on mechanical assemblies, as it is possible to verify proper adherence to manufacturing specifications in an as-assembled state. It is possible to “look” inside the part to verify that any clearance or interference called for by an engineering design are present in an actual, physical assembly.
Additionally, failure analysis can be completed without disassembling or disturbing the components of the assembly. If an internal component to an assembly breaks, you can actually look inside and see what is wrong, without risking further damage to the parts.
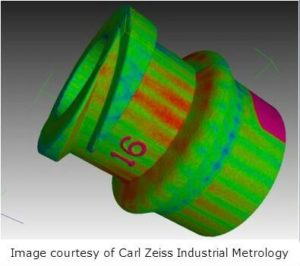
Metrotomography can often achieve sub-micron accuracy, even on complex 3D surfaces and internal geometry. Processing software can overlay the scanned data with the nominal CAD files for a given part and generate a “color map” of the results. This map shows a color-coded version of the part, indicating where there is excess material or where a lack of material exists when compared to the CAD files. This can be useful on complex 3D surfaces where traditional measurement is difficult, at best, or on internal features where they are virtually impossible.
Process
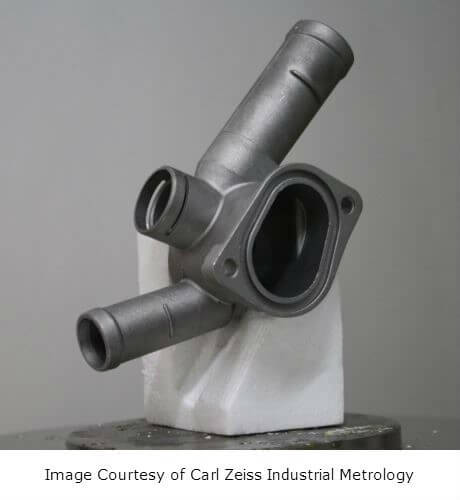
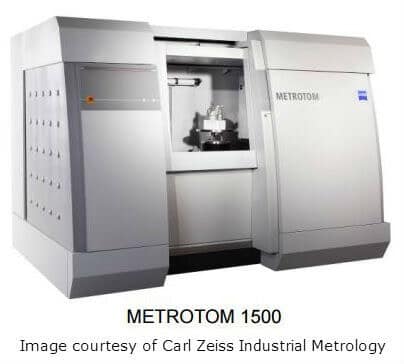
Parts to be scanned are placed on a rotary stage inside the machine; those that are naturally unstable or oddly shaped may be encased in polystyrene to aid in keeping them stable and to prevent them from shifting mid-scan. The machine enclosure is sealed and constructed of heavy-metal to contain all radiation emitted during the scan.
When the scan is started, 2D cross-sectional x-ray images are captured at various stationary positions around the perimeter of the part. These 2D images, as with all digital images, are comprised of an array of pixels. The computer software is able to combine these two-dimensional captured images into a three-dimensional solid model comprised of voxels, which is the equivalent of a three-dimensional pixel, or a pixel that represents volume.
Each of these voxels is displayed in grayscale according to the density of the material being scanned. It is thus possible to analyze the scan for any areas that are too dense (possibly containing contamination or inclusions) or are not dense enough (voids, pin holes, etc.).
Although parts being scanned are bombarded with high-power x-ray radiation during the scan, no residual radiation remains in the part after the scan is complete, and parts are completely safe to continue handling or using. The non-destructive nature of metrotomography is another main benefit, as high-cost parts and assemblies can be measured without the need to damage or destroy them to get the desired results.
As industrial use is a relatively new application of this technology, few people are aware of its existence and availability. The machinery needed to perform these scans is not yet mass-produced, and is therefore relatively expensive.
The good news is – Metrotomography services are available from a number of sources on a contract basis, allowing access to smaller companies and for economical use on smaller projects. Plus, multiple parts or assemblies may be scanned at the same time, which can help keep scanning cost low.
The resolution and accuracy that this process is capable of is extremely fine. Time needed to perform a scan is relatively long, perhaps an hour for a small part, or several hours for a large one; although, typical turn-around time on scans from a contract lab may be as short as several days. Additionally, since such a large amount of data is captured during the scan, file size for the completed model is extremely large. Even a small part can be a gigabyte (or more), depending on the desired resolution.
Raw scan data is in the form of a 3D voxel cloud, but this data can be reverse-engineered back into a solid model or 3D mesh that can be opened and modified in standard CAD software. The software used to process the raw data is also capable of creating dimensional reports that can be used for tooling qualification, first article inspection, or even in-process production measurements, in certain applications.
Conclusion
Ultimately, this is still an emerging technology that has not hit the mainstream. We have only scratched the surface of what is possible. As more companies become aware of this technology and begin to apply it, both the machinery and software will become more available and more affordable, and new applications will arise.
Although Disher does not offer metrotomography services, our experienced project engineers can help recommend if this solution is right for your situation and help facilitate, manage and coordinate any contract work with our vendors.
Written by: Sam Passenger, Manufacturing Engineer | Sam has his bachelor’s degree in Manufacturing Engineering from Ferris State University. He specializes in manufacturing engineering, CNC applications engineering, CAD/CAM, and industrial robotics/automation for industries including automotive, furniture, aerospace, medical and defense.

